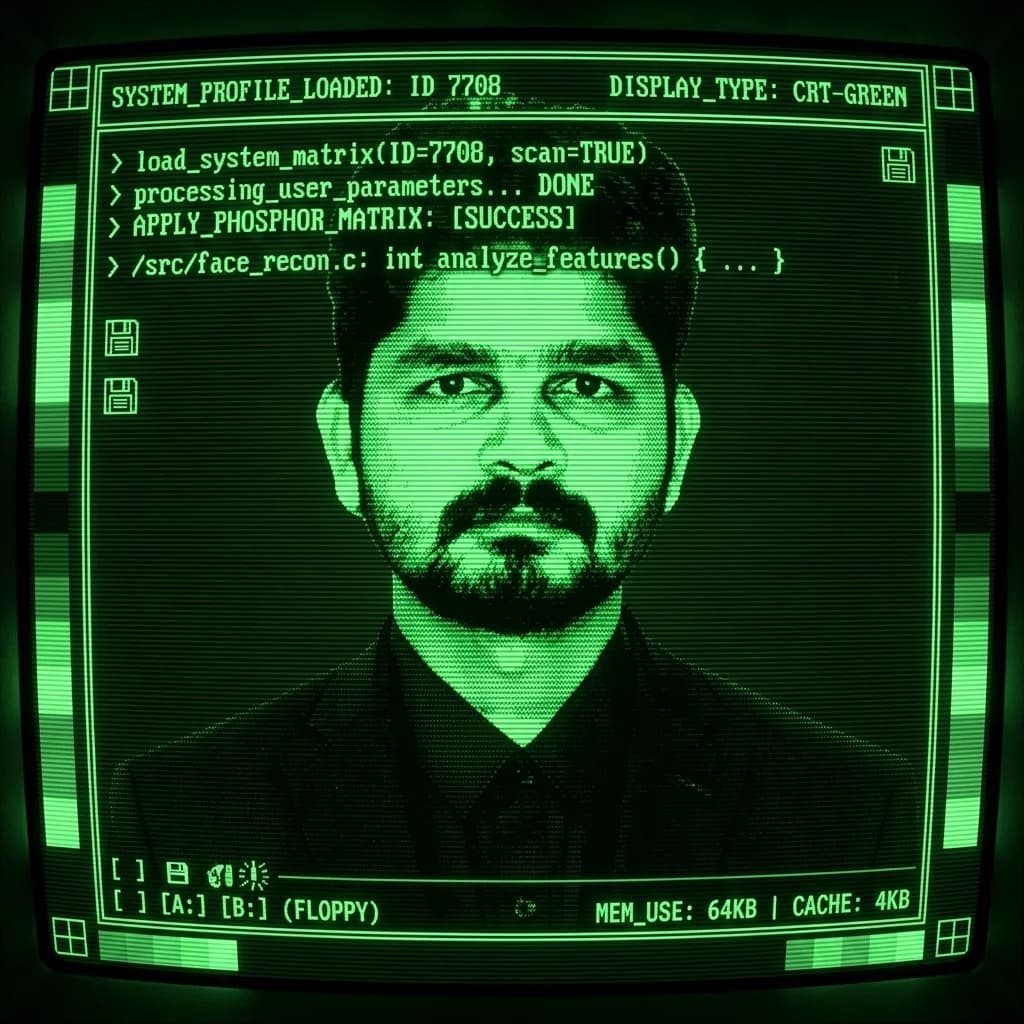
The Nostalgia of the Retro-Tech Terminal Aesthetic
In the fast-moving digital art space of 2026, creators are rediscovering the beautiful limitations of early computing. The Prompt Playground Retro-Tech aesthetic is a glowing tribute to 1980s computer interfaces, DOS command lines, and early terminal monitors. Combining high-contrast green or amber monochrome palettes, horizontal phosphor scanlines, curved glass tube reflections, and pixelated dither grids, this design style projects a raw, industrial vibe that instantly commands attention.
In this technical masterclass, we will guide you through transforming a modern studio portrait of our founder, Laxman Kumawat—wearing a clean black suit and shirt—into a premium retro terminal graphic. By utilizing precise pixel mapping, distortion formulas, and terminal text injections, we will bridge the gap between elegant corporate portraiture and vintage hacking environments.
📌 KEY TAKEAWAYS: 5-PHASE WORKFLOW
- Phase 1: Stark Silhouette: Isolate the high-contrast suit portrait against a clean backdrop.
- Phase 2: Slicing & Distortions: Slice the image geometrically or layer double-exposures.
- Phase 3: Liquification / CRT Grids: Stretch fabric edges or map phosphor CRT screen curves.
- Phase 4: Color Aberration / Earthy Grading: Split RGB channels for lens effects or map earthy earth tones.
- Phase 5: Swiss Print Typography: Anchor the graphic inside a high-end structured coordinate grid.
📟 THE METAMORPHOSIS: RAW VS RETRO-TECH 📟

Traditional Studio Portrait
Stark white backdrop, sharp geometric posture, and deep black velvet fabric textures. The high contrast provides the perfect foundation for digital edge tracing.
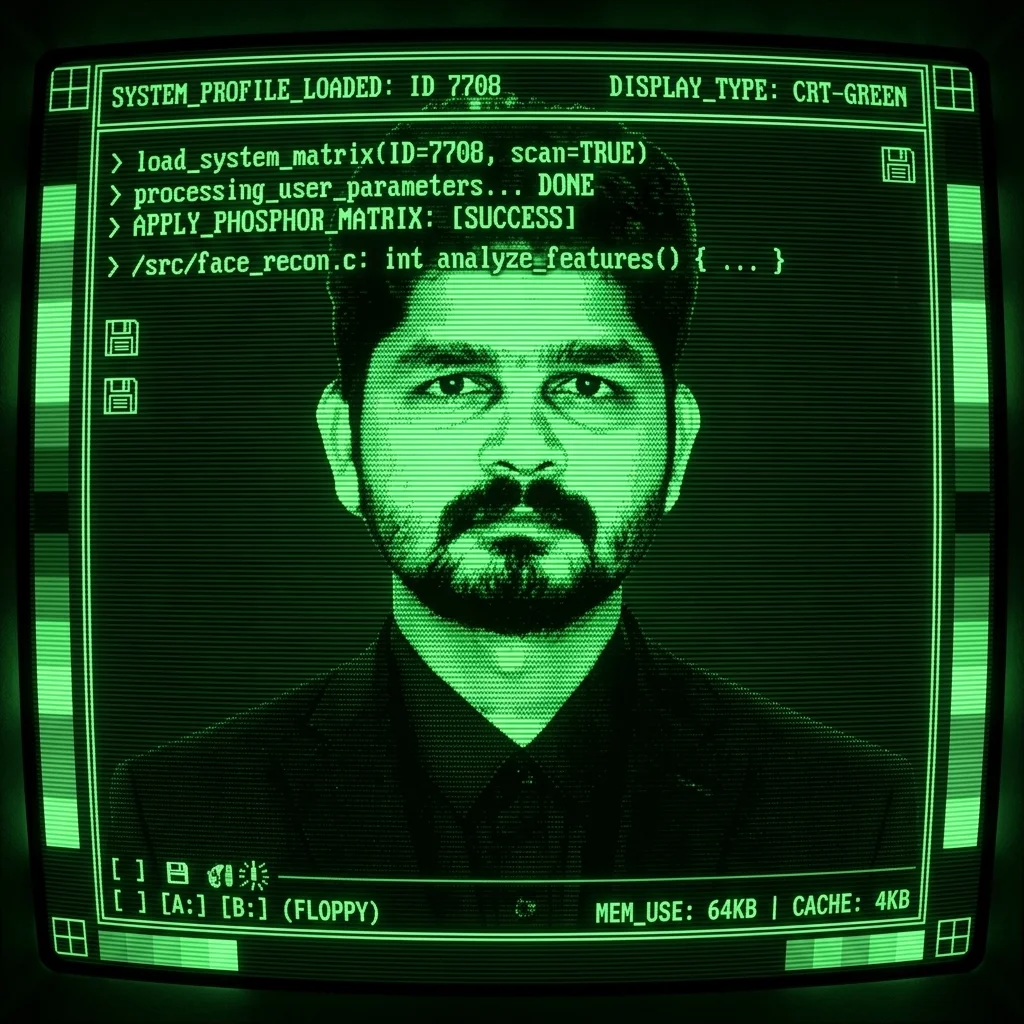
Green CRT Terminal Warp
Curved CRT pincushion glass, horizontal phosphor scanline overlays, pixelated monochrome Bayer dithering, retro CLI system overlays, and floppy drive interface headers.
Step-by-Step Technical Guide
Transforming a clean studio photo into a retro computer display requires specific layered effects to accurately match 1980s display hardware. Follow this technical guide using Photoshop, Figma, or GIMP to achieve the ultimate retro terminal output.
Step 1: Preparing the Stark Outline
Just like with the Reality Warp, the success of the Retro-Tech effect depends entirely on your silhouette. The solid black outline of the suit jacket provides clear geometric limits that are easy to isolate and manipulate.
- High Silhouette Contrast: Having dark clothing like a black suit jacket against a pure white backdrop makes isolating the subject seamless.
- Extract Subject: Duplicate the layer and mask out the white background. Keep the isolated subject on a transparent layer. Place a solid black (#000000) fill layer underneath.
- Sharpen Features: Apply a slight Smart Sharpen (Amount: 80%, Radius: 1.2px) to enhance the hair details and suit collars before dithering.
Step 2: CRT Screen Curvature & Vignette
Classic CRT monitors didn't have flat glass. They were thick, curved, bulbous tubes that distorted the image at the screen edges.
- Convert your prepared portrait layer into a Smart Object.
- Go to Filter > Distort > Spherize (or use the Lens Correction filter with 'Remove Distortion' set to a negative value). Use a value of +12% to +18% to create a subtle outward 'pincushion' bulge that stretches the center of the image.
- Create a new layer on top, set its blend mode to Multiply, and use a soft, large black brush to paint dark vignettes around the four corners. CRT displays always suffer from darker corner illumination (falloff).
- Apply a very subtle radial blur to the corners (Filter > Blur > Radial Blur, Amount: 3, Spin) to replicate the natural focal decay of old cathode ray electron beams as they hit the glass corners.
Step 3: Horizontal Scanlines & Screen Flicker
Phosphor screens display images by shooting electronic beams in horizontal lines. We must overlay these scanlines precisely.
- Create a new small canvas (2px wide by 4px high) with a transparent background.
- Use the Pencil tool to draw a horizontal black line that fills the bottom 2 pixels, leaving the top 2 pixels transparent. Go to Edit > Define Pattern and name it 'Scanline Grid'.
- Return to your main portrait canvas, create a new layer on top, and fill it with the 'Scanline Grid' pattern using Edit > Fill.
- Set the Scanline layer blend mode to Overlay (or Multiply) and reduce the opacity to 15% to 25%. This creates precise, uniform phosphor scanlines.
- To simulate phosphor decay glow, double-click the scanline layer, and add an Outer Glow (Blend Mode: Screen, Color: #39FF14, Size: 3px, Opacity: 15%). This mimics the electric charge bleed of glowing phosphorus.
Step 4: Dither Mapping & Color Tonal Reductions
Vintage computers could only display a limited number of colors (often just 1-bit or 2-bit per pixel) and used dithering grids to simulate gradients.
- Select your curved subject layer. Add a Gradient Map adjustment layer above it.
- Configure the gradient bar using these two precise hex codes to get that signature phosphor look:
- To inject the dither grid: Create a new layer above the gradient map. Go to Filter > Pixelate > Halftone Screen or Color Halftone (Max Radius: 4px, Channel Angles: 45°). Set this layer blend mode to Soft Light or Overlay at 30% opacity to mimic the Bayer dither matrix.
- Alternatively, convert the image to Bitmap Mode (Image > Mode > Bitmap), setting the resolution to 72 DPI, and choosing Diffusion Dither or Pattern Dither. Copy the dithered pixels back onto your green-scaled workspace for a hyper-accurate 1980s look.
Step 5: Monospace CLI Codes & Floppy Disk Grids
The defining element of a "Prompt Playground" is the command-prompt interface framework overlaid on top of the portrait.
- Select a retro monospace font like Courier New, PxPlus IBM, or Perfect DOS VGA.
- Add a header system bar at the top:
[ SYS-INIT: v8.86 ] [ DISK DRIVE: A: ] [ BAUD RATE: 9600 ] [ STATUS: ONLINE ] - Add floating terminal instructions near the portrait borders to complete the playground narrative:
C:> RUN PORTRAIT_ANALYSIS.EXE >>> LOADING MATRIX GRIDS... [OK] >>> SCANNING Silhouette VECTORS... [100%] >>> FOUNDER AURA LEVEL: OVER 9000 C:PROMPT_PLAYGROUND> █ - Draw a thin, glowing green border around the entire screen frame (3px width) with double-line corners, simulating the IBM BIOS setup menus or retro diagnostic systems.
💡 EXPERT TIPS FOR A RETRO-TECH MASTERPIECE 💡
- Simulate Phosphor Burn-in: Add a very faint, ghost-like duplicate of the main text overlays shifted 20px to the right with 5% opacity. This replicates the phosphor ghosting common on heavily-used terminal screens.
- Control Dither Density: Ensure the dither is fine enough that the facial details of the subject (like Laxman's expression) remain readable, while letting the solid black suit jacket turn into a dense, beautifully textured pixel grid.
- Keep the Palette Strict: Do not introduce secondary colors (like red or blue) unless they are extremely desaturated. A true terminal aesthetic works best when it is strictly monochrome (all green, all amber, or all paper-white).
- Integrate with AI Prompts: If you are generating a retro-tech background or companion artwork, try using this prompt:
"Retro-tech IBM-PC green terminal display, curved CRT screen, horizontal scanlines, 1-bit Bayer dither matrix, BIOS menu borders, ASCII artwork, neon green glowing phosphor, Command line prompt overlay, 8k resolution, retro aesthetic".
❓ FREQUENTLY ASKED QUESTIONS (FAQ)
Q: How do I control the phosphor scanline intensity on smaller screens?
A: To prevent screen scanlines from blending into an awkward grid on small high-density mobile screens (retina displays), lock your scanline pattern layer opacity between 12% and 15% and make sure the scanline spacing is at least 3px.
Q: What font should I use if I do not have DOS or IBM monospace options?
A: Any standard monospaced coding font will work perfectly. Fira Code, Source Code Pro, or JetBrains Mono will maintain the precise retro-tech grid layout while being highly optimized for modern screens.
Conclusion: Step Into the Terminal Grid! 👑
The Prompt Playground Retro-Tech style is the ultimate fusion of modern portraiture and old-school engineering nostalgia. By taking a high-contrast raw portrait—like Laxman Kumawat's signature black suit photo—and overlaying curved glass distortions, phosphor scanline filters, limited bit dithering, and retro bios borders, you create an artwork that carries deep historical character and a glowing technological vibe. Load your terminal, execute your layout scripts, and start coding your own retro-tech visuals today! Stay based!